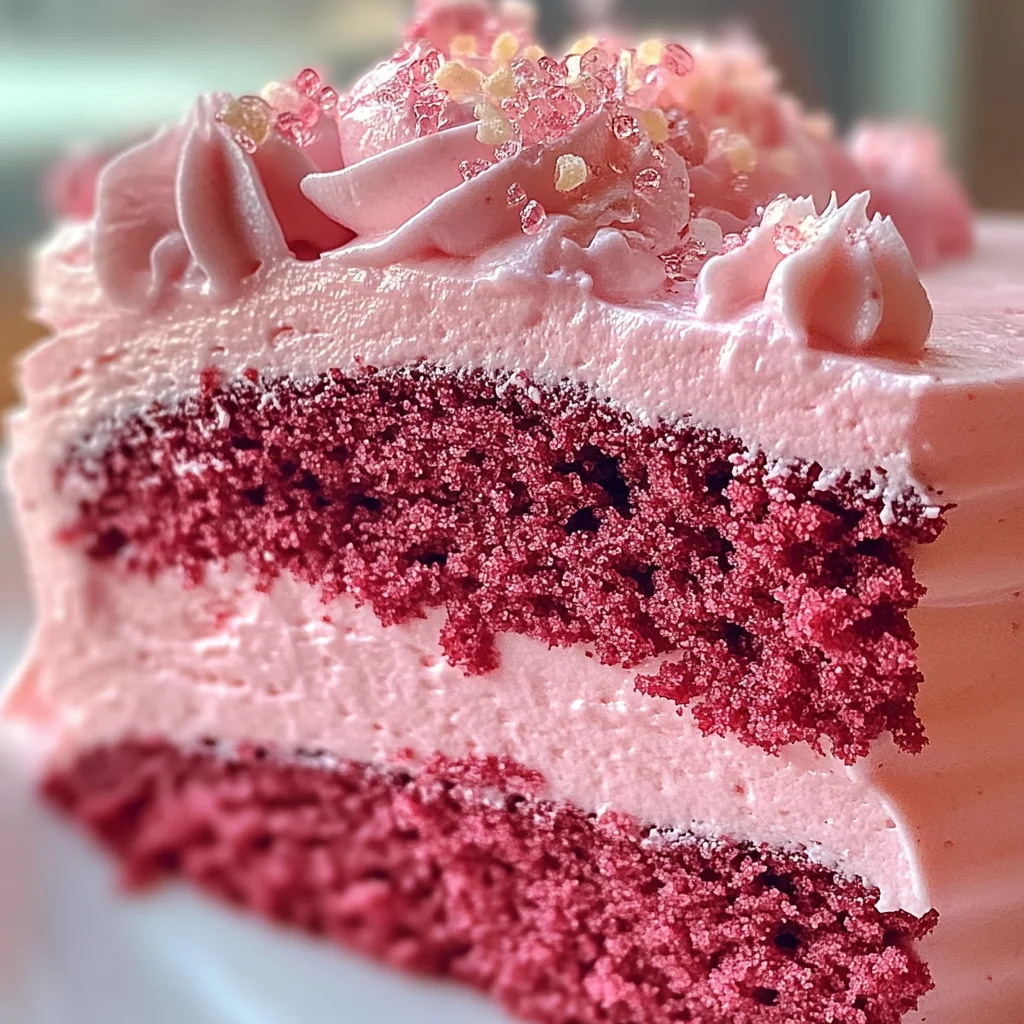
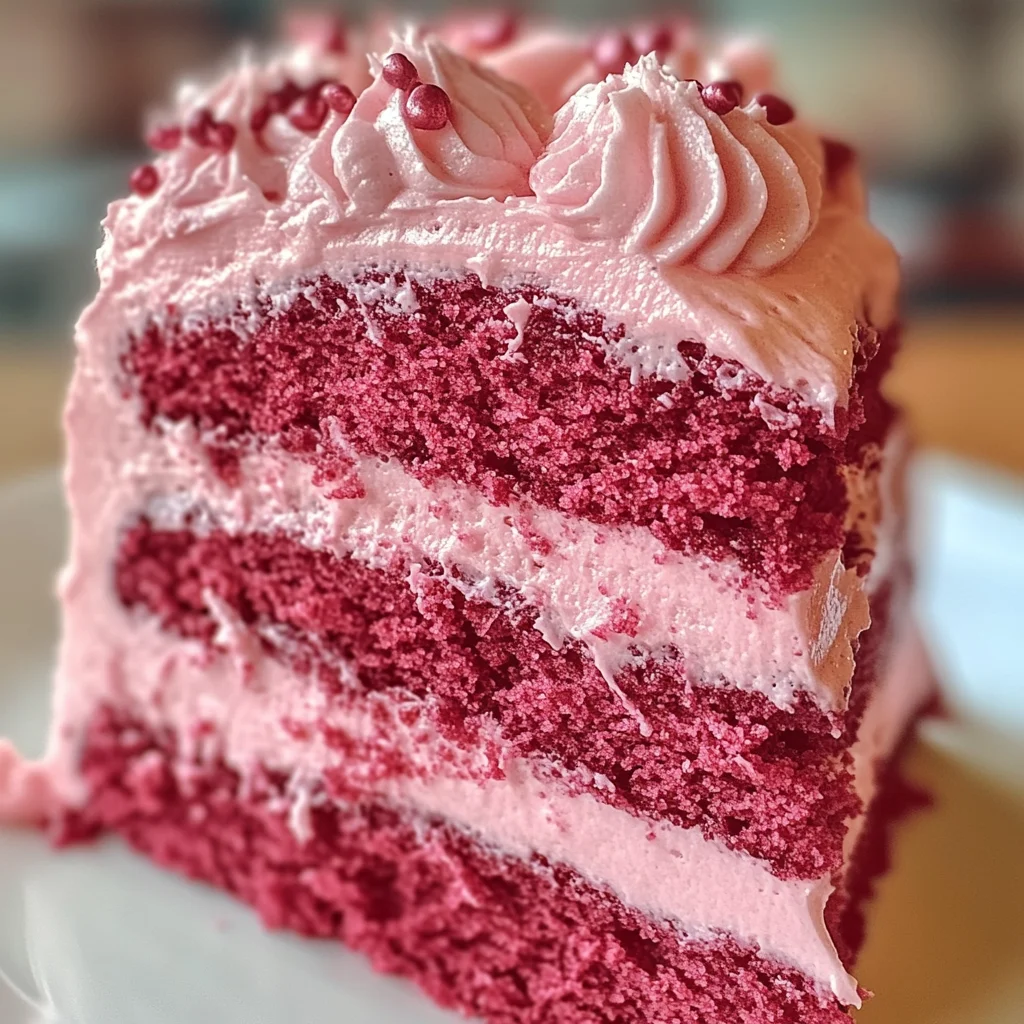
Mother’s Day Pink Velvet Cake
If you’re looking for a show-stopping dessert that will make everyone feel special, look no further than this Mother’s Day Pink Velvet Cake. This cake is not just a feast for the eyes; it’s a delightful blend of cocoa and vanilla that creates a soft, fluffy texture. It reminds me of cozy family gatherings and sweet moments shared over dessert. Whether you are celebrating Mother’s Day or simply want to bring a little joy to your weeknight dinner, this cake is sure to impress!
Baking this cake is a wonderful way to create sweet memories filled with love and joy. The vibrant pink layers and creamy frosting make it perfect for any occasion where you want to spread happiness.
Why You’ll Love This Recipe
- Easy to Make: With straightforward instructions, you’ll be able to whip up this cake in no time!
- Family-Friendly Appeal: Kids and adults alike will adore the fluffy texture and rich flavor.
- Versatile for Any Occasion: While it’s perfect for Mother’s Day, this cake shines at birthdays, brunches, or even just because!
- Make-Ahead Convenience: Bake the layers in advance, then frost them later for an easy dessert option.
- Delicious Flavor: The combination of cocoa and vanilla makes each bite unforgettable.
Ingredients You’ll Need
Creating this stunning Mother’s Day Pink Velvet Cake is easy with these simple, wholesome ingredients. You probably have most of them in your pantry already!
- 2 ½ cups cake flour
- 1 ¾ cups granulated sugar
- ½ cup unsweetened cocoa powder
- 1 tbsp baking powder
- ½ tsp salt
- ¾ cup unsalted butter, softened
- 4 large eggs (room temperature)
- 1 cup buttermilk
- 2 tsp pure vanilla extract
- Red food coloring (to achieve desired pink hue)
- Cream cheese frosting (for topping)
Variations
This recipe is wonderfully flexible! Here are some fun variations you might enjoy trying:
- Swap the buttermilk: Use yogurt instead of buttermilk for a slightly different flavor and texture.
- Add almond extract: A hint of almond can elevate the flavor profile beautifully.
- Fresh fruit toppings: Consider adding strawberries or raspberries on top for a refreshing contrast.
- Layer it up: For an extra indulgent treat, add another layer of frosting between the cakes.
How to Make Mother’s Day Pink Velvet Cake
Step 1: Preheat and Prepare
Preheat your oven to 350°F (175°C) and grease two 9-inch round cake pans with butter or oil before dusting them with flour. This ensures your cakes will come out easily after baking.
Step 2: Mix Dry Ingredients
In a bowl, whisk together the cake flour, cocoa powder, baking powder, and salt. This step is crucial as it evenly distributes the leavening agent throughout your flour mixture, ensuring your cake rises beautifully.
Step 3: Cream Butter and Sugar
In a separate bowl, cream together the butter and sugar until light and fluffy—about three minutes. This process incorporates air into the mixture, giving your cake that desirable lightness.
Step 4: Incorporate Eggs
Beat in the eggs one at a time, making sure each one is fully mixed in before adding the next. This helps create a smooth batter without lumps.
Step 5: Combine Wet Ingredients
Add in the buttermilk, vanilla extract, and red food coloring. Mix until everything is well combined. The food coloring is what gives this cake its beautiful pink hue!
Step 6: Fold in Dry Ingredients
Gradually fold in the dry ingredients until you have a smooth batter. Be careful not to overmix here; gentle folding helps maintain that airy texture we love.
Step 7: Bake
Divide the batter between the prepared pans and bake for about 25-30 minutes or until a toothpick inserted into the center comes out clean. Keep an eye on your cakes; every oven is different!
Step 8: Cool Down
Allow your cakes to cool in the pans for about ten minutes before transferring them to wire racks to cool completely. Cooling them properly prevents sogginess when you frost.
Step 9: Frost Away!
Once cooled, it’s time to frost with cream cheese frosting. Spread generously between layers if you’re stacking them high! Enjoy every moment as you create this stunning centerpiece for your table.
Pro Tips for Making Mother’s Day Pink Velvet Cake
Baking the perfect cake can be a delightful experience, and with a few pro tips, you can ensure your Mother’s Day Pink Velvet Cake turns out beautifully!
-
Use room temperature ingredients: Bringing your eggs and buttermilk to room temperature helps create a smoother batter that traps air better, resulting in a fluffier cake.
-
Don’t overmix the batter: Mixing just until combined prevents the development of gluten, which can lead to a dense texture. Aim for a smooth consistency without lumps.
-
Check for doneness correctly: Instead of just relying on time, use a toothpick inserted into the center. If it comes out clean or with a few crumbs, it’s done! This ensures your cake is perfectly baked.
-
Cool cakes completely before frosting: Allowing your cakes to cool entirely prevents the frosting from melting and sliding off. This also makes for easier handling when stacking.
-
Experiment with color: Adjust the amount of red food coloring to achieve your desired shade of pink! A deeper hue can make for an eye-catching presentation.
How to Serve Mother’s Day Pink Velvet Cake
Presenting your Mother’s Day Pink Velvet Cake can be just as fun as baking it! Here are some ideas to make your serving extra special.
Garnishes
- Fresh berries: Strawberries or raspberries not only add a pop of color but also provide a refreshing tartness that balances the sweetness of the cake.
- Edible flowers: Consider decorating with edible flowers like pansies or violets for an elegant touch that enhances the cake’s visual appeal.
- Shaved chocolate: Lightly sprinkle shaved dark chocolate on top for added texture and flavor contrast.
Side Dishes
- Vanilla ice cream: A scoop of creamy vanilla ice cream pairs beautifully with the rich flavors of pink velvet cake, offering a delightful contrast in temperatures and textures.
- Fruit salad: A light fruit salad made with seasonal fruits adds freshness and complements the sweet notes of the cake, making it a great palate cleanser.
- Whipped coconut cream: For those looking for a dairy-free option, whipped coconut cream serves as a light and airy addition that enhances the overall experience.
- Chocolate-dipped strawberries: These indulgent treats bring together classic flavors that resonate well with chocolate lovers and create an inviting dessert platter.
With these serving suggestions, your Mother’s Day celebration will be both beautiful and delicious! Enjoy creating sweet moments with loved ones around this delightful pink velvet masterpiece.
Make Ahead and Storage
This Mother’s Day Pink Velvet Cake is not only a showstopper but also an excellent choice for meal prep. You can bake it ahead of time, making your special day less stressful while still delivering a delightful dessert.
Storing Leftovers
- Allow the cake to cool completely before storing.
- Place the cake in an airtight container or cover with plastic wrap.
- Store at room temperature for up to 3 days or in the refrigerator for up to a week.
Freezing
- Wrap each layer of the cooled cake tightly in plastic wrap.
- Place wrapped layers in a freezer-safe bag or container.
- Freeze for up to 3 months. Thaw in the refrigerator overnight before frosting.
Reheating
- If you prefer warm cake, preheat your oven to 350°F (175°C).
- Place slices on a baking sheet and heat for about 10 minutes, just until warmed through.
- Alternatively, microwave individual slices for about 15-20 seconds.
FAQs
Here are some common questions about making this delightful cake:
Can I use a different food coloring for the Mother’s Day Pink Velvet Cake?
Absolutely! While red food coloring provides that beautiful pink hue, you can experiment with other colors. Just make sure they are gel-based for the best results.
How do I make sure my Mother’s Day Pink Velvet Cake stays moist?
To keep your cake moist, avoid overmixing once you add the dry ingredients. Additionally, using buttermilk helps maintain moisture, so consider keeping that ingredient as part of your recipe!
What can I serve with my Mother’s Day Pink Velvet Cake?
This cake pairs wonderfully with fresh fruit, whipped cream, or even a scoop of dairy-free ice cream. These additions can enhance the flavors and make it even more enjoyable.
How should I store my Mother’s Day Pink Velvet Cake?
Store leftovers in an airtight container at room temperature for up to three days or in the refrigerator for about a week. For longer storage, freeze layers wrapped tightly.
Can I make this cake gluten-free?
Yes! You can substitute all-purpose flour with a gluten-free blend. Be sure to check that all other ingredients used are also gluten-free.
Final Thoughts
Baking this Mother’s Day Pink Velvet Cake is not just about creating something delicious; it’s about making sweet memories and celebrating love. I hope you enjoy making this enchanting treat as much as I do! It’s perfect for any gathering and will surely bring smiles to everyone around your table. Happy baking!
Mother’s Day Pink Velvet Cake

If you’re seeking an unforgettable dessert to bring joy to your celebrations, look no further than this Mother’s Day Pink Velvet Cake. With its vibrant pink layers and a rich, creamy frosting, this cake is not only visually stunning but also a delightful blend of soft vanilla and cocoa flavors. Perfect for Mother’s Day or any special occasion, each slice evokes warmth and sweetness reminiscent of family gatherings. Easy to prepare and versatile, it’s sure to impress both kids and adults alike. Bake it ahead for convenience and enjoy creating sweet memories with loved ones around this charming centerpiece.
- Prep Time: 30 minutes
- Cook Time: 30 minutes
- Total Time: 1 hour
- Yield: Serves approximately 12 slices 1x
- Category: Dessert
- Method: Baking
- Cuisine: American
Ingredients
- 2 ½ cups cake flour
- 1 ¾ cups granulated sugar
- ½ cup unsweetened cocoa powder
- 1 tbsp baking powder
- ½ tsp salt
- ¾ cup unsalted butter, softened
- 4 large eggs (room temperature)
- 1 cup buttermilk
- 2 tsp pure vanilla extract
- Red food coloring (to achieve desired pink hue)
- Cream cheese frosting (for topping)
Instructions
- Preheat your oven to 350°F (175°C) and grease two 9-inch round cake pans with butter or oil, dusting with flour.
- In a bowl, whisk together the cake flour, cocoa powder, baking powder, and salt.
- In another bowl, cream the softened butter and granulated sugar until light and fluffy (about three minutes).
- Beat in the eggs one at a time until fully incorporated.
- Add buttermilk, vanilla extract, and red food coloring; mix until combined.
- Gradually fold in the dry ingredients until just smooth; do not overmix.
- Divide the batter between the prepared pans and bake for 25-30 minutes or until a toothpick comes out clean.
- Cool cakes in their pans for ten minutes before transferring them to wire racks to cool completely.
- Once cooled, frost with cream cheese frosting as desired.
Nutrition
- Serving Size: 1 serving
- Calories: 410
- Sugar: 35g
- Sodium: 230mg
- Fat: 18g
- Saturated Fat: 11g
- Unsaturated Fat: 6g
- Trans Fat: 0g
- Carbohydrates: 54g
- Fiber: 1g
- Protein: 5g
- Cholesterol: 80mg